Wheel Throwing: First Day

“I can do this!”
I had been so excited but also so nervous to start this class. I had tried throwing one time before and it was challenging, messy and I wasn’t very good at it. In my own defence I wasn’t in the right head space that day, and I’ve been told by potters that your mind set is everything! So I went into this class with a positive attitude; I was ready to fail, laugh about it, try again, probably fail a few more times and hopefully get better try by try.
There are supposed to be 6 students in the class with one instructor, but for whatever reason half the class couldn’t make the first day. I’m sure the other 3 students are great, but I was stoked to only have to share the instructor with 2 other people! After general introductions, we learned how to weigh and wedge clay.
Wedging clay is a term to describe preparing the clay for using. The process homogenizes the clay by evenly distributing moisture, getting rid of air pockets and aligning the clay particles. There are several methods of wedging that are described in this article. We used the rams head method to wedge 500g of clay to make mugs. You’re supposed to wedge the clay at least 100 times before it’s ready! I lost count and just stopped when my arms got sore or when everyone else was done, which ever came first. I can’t imagine the wedging process when potters throw big pieces of 4lbs of clay or more!
After we wedged the clay, the instructor gave a demonstration on how to throw cylinders for pots, mugs and other cylinder-esque shapes. Then it was time to get muddy!
I few things had stuck with me from my first time throwing; I kept getting scared and releasing my hands to quickly, sending the pot into a spiralled broken chaos, and I was just generally moving to quickly. So I was sure to move slow, take my time, and be intentional. I surprisingly got the hang of it pretty quickly! Having 1/3 of the instructors attention was awesome, she was able to give me pointers before I realized I needed them, and answer any questions I had right away.
I made 3 pieces, all of which were meant to be mugs…. The first piece is definitely a mug, my walls were tall and straight, a simple piece but one I am proud of nonetheless. My second piece got a little wider, and I bulged out the bottom to make it more interesting, but it’s bordering on small pot rather than a mug. My third piece is a bowl, it was supposed to be a mug, but it ended up being a bowl. I was having a hard time pulling walls straight up, they always seemed to flare out. This happened with the second piece as well but I was able to collar it enough to salvage its identity as a mug.
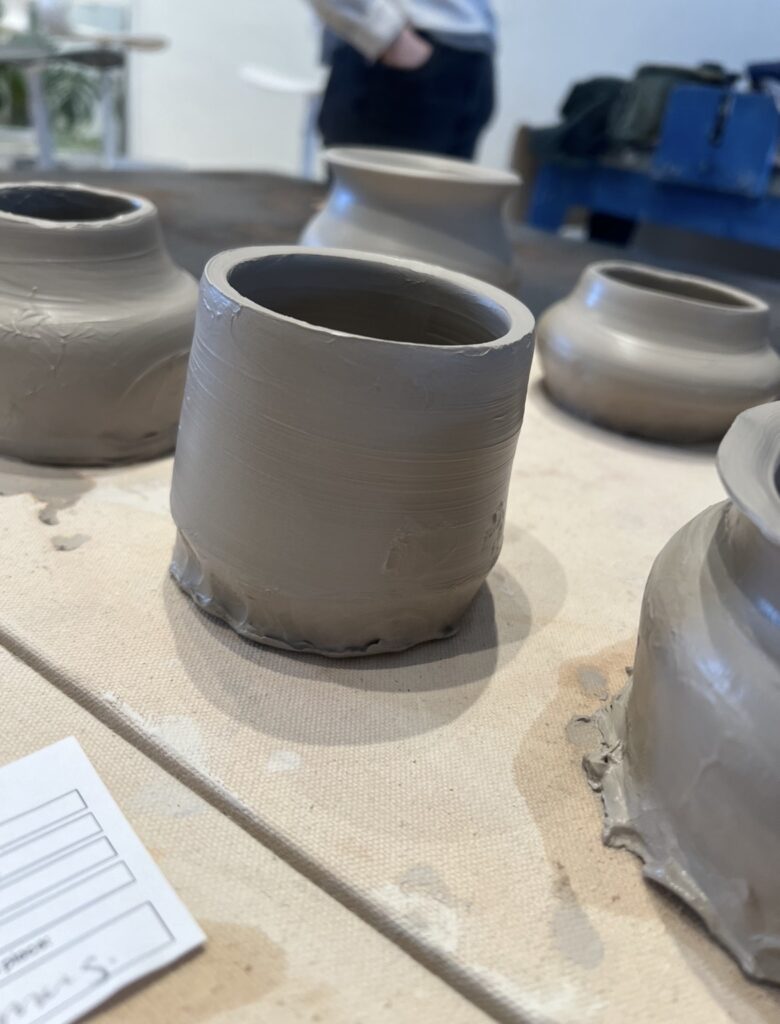
What I learned Piece 1:
- I can do this!
- Slow and steady does it
- lots of water is needed so your hands hydroplane along the clay reducing resistance and clay lose
- Taking the piece off the wheel at the end is the hardest part
I kept this one simple mostly because I like a simpler shape so I can add carvings and finishing designs later, and because I wanted to start with the basics before complicating anything
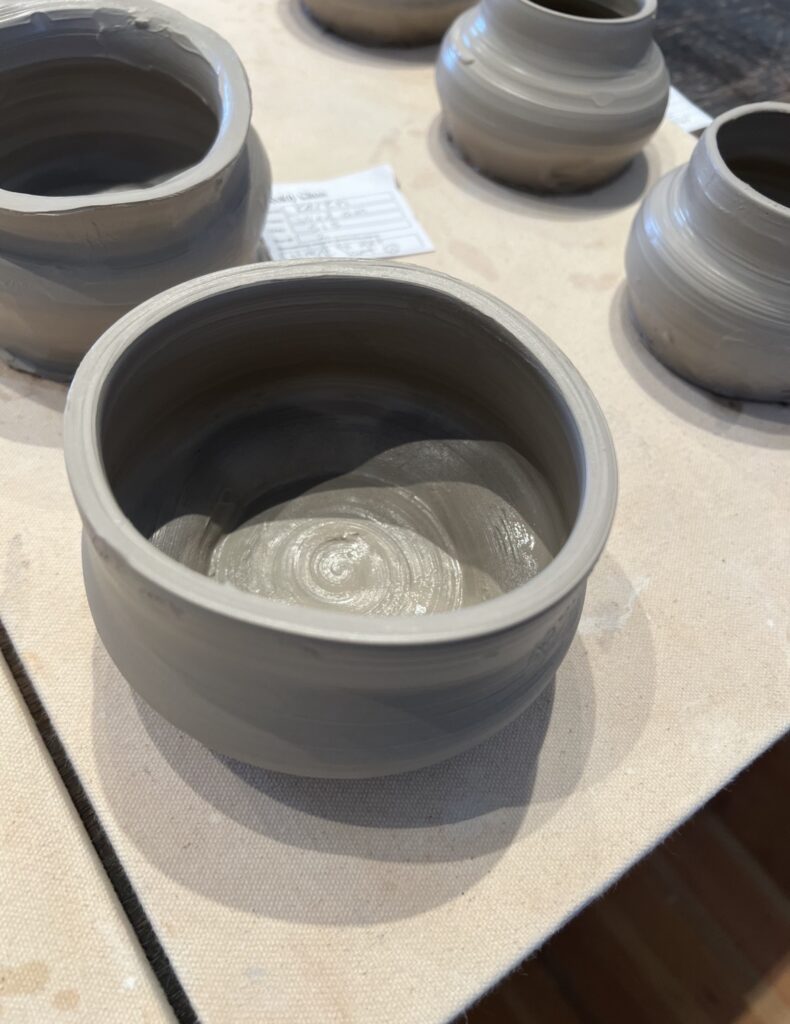
What I Learned Piece 2:
- collaring! The process of narrowing the piece after its flared out. It’s like giving the mug a gentle hug with both hands. However I went to quickly and the clay torqued – so I had to trim the top losing a lot of height
- My walls kept flaring out and I couldn’t figure out why.
- I really struggled to get this off the wheel, warping the whole thing in the process – but the instructor told us not to worry that we can reshape it next week when its “leather dry”
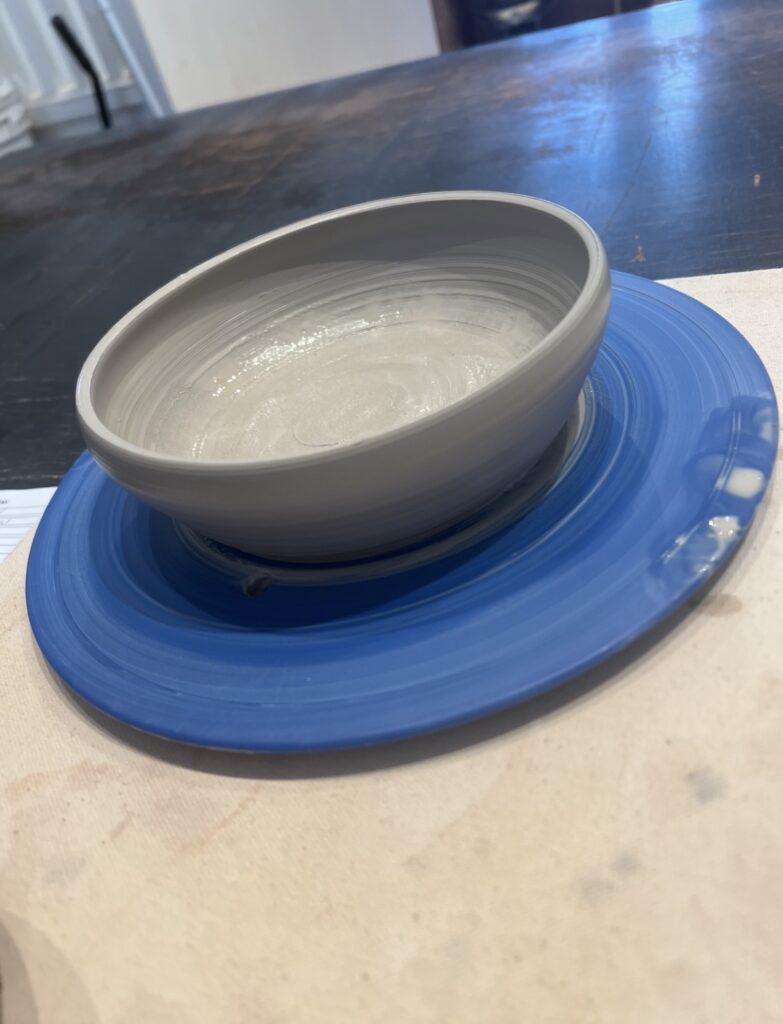
What I learned Piece 3:
- Started out as a mug, but my walls flared passed the point of no return so I just went for the bowl. To throw a bowl you’re inner fingers apply more pressure than the outer ones when pulling up the walls
- Centering your piece is hard! It’s one of the first steps that I struggled with in all my pieces. But I realized while doing this piece that you have to feel for the centering, not just go through the motions and muscle it.
- We left the bowl on the wheel plate to dry … I wasn’t going to try to remove that
Things to Work on Next Time
- Slowing down the wheel when pulling up the walls: I think maybe my walls were flaring out because my wheel was too fast and there was too much centrifugal force pulling my walls outwards
- Centering my clay with intention: applying pressure to the piece slowly and gently, feeling for it to be centered, then slowing easing off with the pressure.
- I kept forgetting to smooth out my base! I want to remember that, and also slow down when doing so
Questions I have
- What is the structure of clay? Why is it important to align the direction of clay particles before throwing?
- How many does wheel speed impact things? Is it harder to move the clay when it’s moving slower? faster?
- How do people possible throw such big pieces?!
- How come potters on instagram aren’t covered in mud like I was at the end of class?
Wheel Throwing Process Overview
- Wedge clay (100 times)
- Stick clay to centre of wheel. Manually turn wheel as you push down bottom edges of clay onto the wheel. Wiggle the clay to ensure that it has stuck to the wheel.
- Cone clay 3 times: Hold hands on either side of the clay and push together leaving room for the clay to cone up through your hands, then push cone back down, with one hand supporting the base while the other bends the top of the cone down (like a joystick). Repeat 3 times.
- Center clay: gently apply pressure with the base of your left hand, pushing toward the top right corner of the wheel, while the right hand “karate chops” the clay from above. Lightly place your finger on edge of class to test if it’s centred: should feel smooth not like it has a heart beat.
- Create the hole: place your thumb in the centre of the clay and apply pressure until you reach the first knuckle. Switch the your two middle fingers, evenly applying pressure.
- Check the base: stop the wheel and use the pin tool the check the thickness of the base by inserting it into the base, placing your finger on the tool where the bottom of the clay reaches, then remove to check. Should be about 1cm.
- Pull out the base: left hand supports as you use your two middle fingers to slowly pull the walls outward toward your belly button until you’ve reached your desired circumference
- Smooth out the bottom: smooth out the edges by moving your finger from centre of the piece to the edge and back again. Repeat slowly until base has no ridges
- Pull walls up: slow wheel, apply water to both sides of the wall. Connect your hands and place two fingers on both sides of the wall so they mirror each other. Slowing apply pressure with the outside hand and pull both hands up slowly. Smooth the rim and repeat.
- Shape the piece: collar, bulge or create lips to give the piece character
- trim the bottom: use the trimming tool to slowly insert and cut away the edge of the piece
- remove the piece: stop the wheel. Use the wire tool to separate the piece from the wheel, then very gently pick piece up and set to dry
Anja, your inquiry is something I don’t think I would ever have the patience for. I appreciated the overview and your next tasks to learn. As with others who are pursuing a self-directed learning activity, I am hoping that you can focus on the learning process. In your blog, discuss how you decided where to look for information, support, or inspiration. What you learned about yourself in your own learning experiences, and how you might use this experience to inform your teaching practice. How would you design similar (not necessarily “wheel-throwing” as the subject) personal learning experiences with students?